 |
VERY VERY CHEAP PAPER CD CASE !! |
Introduction:
If you are one of those that don't want spend more money that the exclusively necessary to by a CD, then you come to the right place.
Heaven the most cheaps CD cases can cost almost the same as an CD and the envelopes (sleeves) that are made on paper makes us wondering, well paper, I have that in home why pay for it?
Yes this page tells you how make a paper case in very few steps and how you can get him from your printer with the CD cover already on it, then only fold it and in less than the time needed to burn one CD you have the desired paper case that let's you put not one but 2 CD's in side. It's true, only with a A4 sheet of paper you can put 2 CD's inside :-)
To learn how to make your own paper cases follow the 3 topics present in this page, Editing Paper Case, Printing Paper Case and Doubling Paper Case.
Some Pictures of Paper Cases:


Files to Download:
Editing Paper Case:
- Steps on GIMP
-
- Open the file PaperCaseModel.xcf and the image cover with the GIMP.
See ScreenShot1GIMP.jpg.
- Copy (C-c) and paste (C-v) the cover image to the PaperCaseModel.xcf image.
If you don't see the image pasted don't worry see next step.
See ScreenShot2GIMP.jpg.
- Now you will note that the Pasted Layer are floating (Floating Selection) press the bottom create new layer in the layers panel to transform them in a layer.
This is necessary to you be able to manipulate the pasted cover.
See ScreenShot3GIMP.jpg.
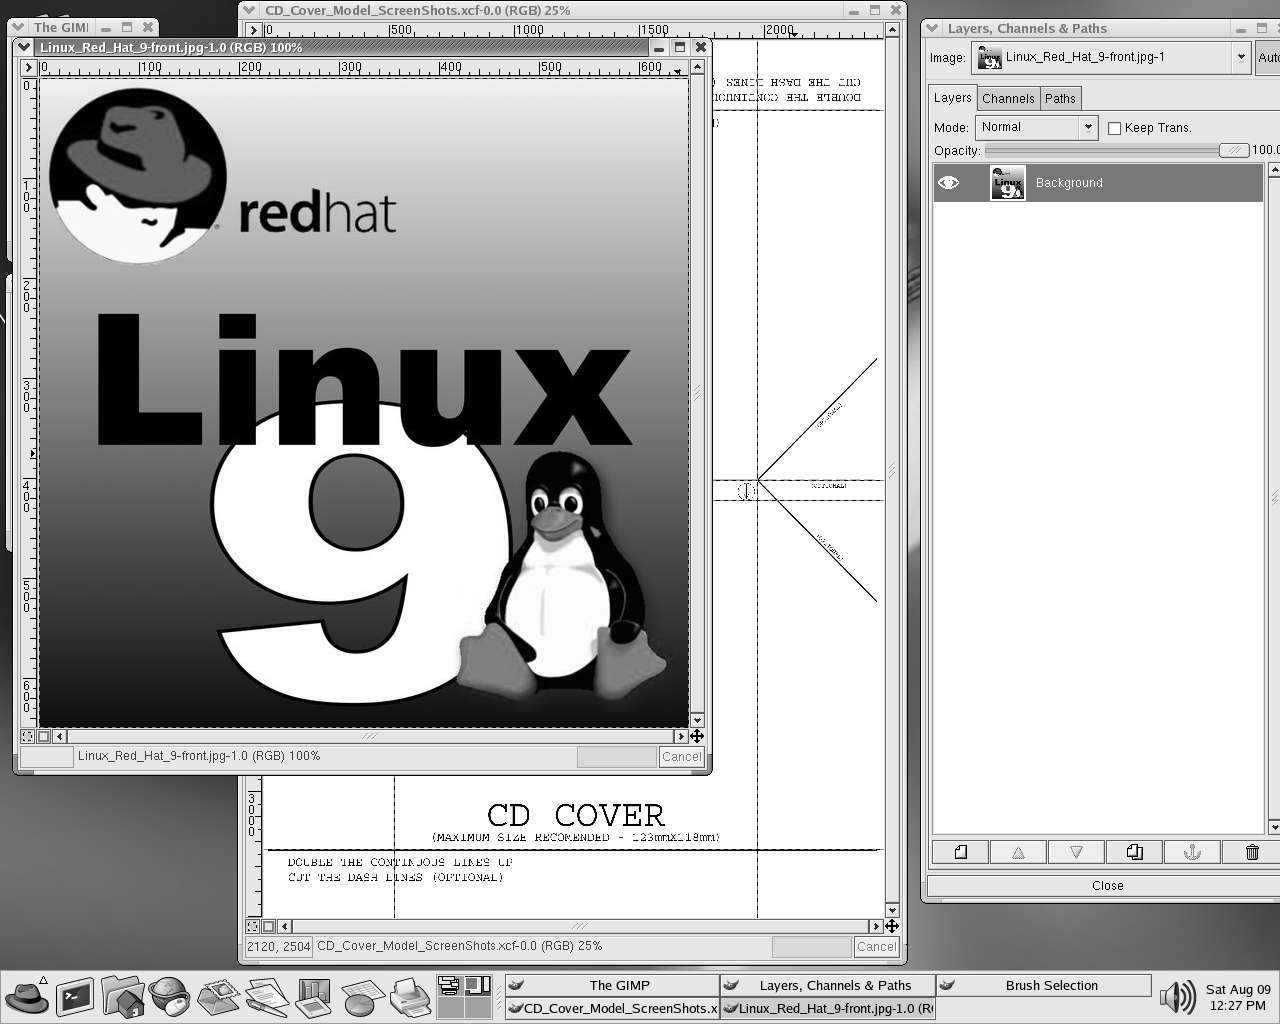
- Select the move tool (m) in the Toolbox and move the cover to one of the down corners until the cover snap to the guide lines.
The snap have to be selected in the View Menu.
See ScreenShot4GIMP.jpg.
- Double click on the Transform Tool in the Toolbox and you will see the Tool Options window, select Scaling and deselect Show Grid press Close.
Resize the image to the size desired, press Control and Alt keys simultaneous to avoid distortion.
See ScreenShot5GIMP.jpg.
- Now is time to put the second cover image, follow the previous steps to this image and then after you open the Tool Options window of the Transform Tool described in the previous step select Rotation and deselect Show Grid.
See ScreenShot6GIMP.jpg.
- When you click on the picture (layer) you will see the Rotation Information window, define the angle as 180 degrees and press Rotate to rotate the image.
See ScreenShot7GIMP.jpg.
- After you rotate the image is time to edit the title of the case, select the layer TITLE (click on him in the Layer Menu window) and double click in the Text Tool in the Toolbox (t) and on the Tool Options window check the Use Dynamic Text.
Next click on the default title (0 CD TITLE | 1 CD TITLE) and edit him to the desired title. Press OK and you have this job finished.
See ScreenShot8GIMP.jpg.
- Steps on PHOTOSHOP
-
- Open the file PaperCaseModel.psd and the image cover with the PHOTOSHOP.
See ScreenShot1PSD.jpg.
- Copy (C-c) and paste (C-v) the cover image to the PaperCaseModel.psd image.
If you don't see the image pasted don't worry move the correspondent layer up until you see the cover picture.
See ScreenShot2PSD.jpg.
- Make sure that you have the snap selected.
Select the Move tool in the Toolbox and move the cover to one of the down corners until the cover snap to the guide lines.
See ScreenShot3PSD.jpg.
- Select Scale (Edit->Transform) and resize the image.
When resizing check the link to avoid distortion.
See ScreenShot4PSD.jpg and ScreenShot5PSD.jpg.
- Now is time to put the second cover image, follow the previous steps to this image and then select Rotate 180° (Edit->Transform).
See ScreenShot6PSD.jpg.
- After you rotate the image is time to edit the title of the case, select the layer TITLE and select the Text Tool in the Toolbox.
Next click on the default title (0 CD TITLE | 1 CD TITLE) and edit him to the desired title. Press OK and you have this job finished.
See ScreenShot7PSD.jpg.
Printing Paper Case:
- Steps on GIMP
-
- Select Print from File menu (C-p).
- Finally, press the button "Use Original Image Size" on the print panel and center it vertically and horizontally.
See ScreenShot9GIMP.jpg.
- Steps on PHOTOSHOP
-
- Select Print With Preview from File menu (C-p).
See ScreenShot8PSD.jpg.
- Scale the image to 100% and center him.
See ScreenShot9PSD.jpg.
- Finally, press Proceed on Clipping warning.
See ScreenShot10PSD.jpg.
NOTE: If you use other image editor program, when you print make sure you center the image and scale it to the original size, 100% in some programs.
Doubling Paper Case:
- Steps on the Easy Made Paper Case
-
- Fold the paper on the 2 lines parallel to the lower side of the sheet to the side that you still can see the cover image.
- Fold the paper on the 2 lines parallel to the higher side of the sheet to the same side.
- Finally, fold the paper half on the line at middle of the paper. The paper case is made.
See this picture to you have an idea of how your case should look like.
- Steps on the Easy Use Paper Case
-
- Cut with an X-acto the dash lines label as OPTIONAL.
- Fold the lines near the cut off dash lines label as OPTIONAL to the side that you still see OPTIONAL letters.
- Next you will follow the steps on the Easy Made Paper Case.
See this picture to you have an idea of how your case should look like.
Using Paper Case:
- Steps on the Easy Made Paper Case
-
- To insert the CD in the case slide him through the case as seen in this picture, you should slide the CD until you be able to detain him under the paper.
- To remove the CD you can revert the order of inserting or if you have difficulties in this task you can simple unfold the paper on one of the biggest sides an pull the CD out.
- Steps on the Easy Use Paper Case
-
- To insert the CD in the case totally open it, and slide the CD through him as seen in this picture.
- To remove the CD you revert the order of inserting.
Useful Links:
- GIMP
-
http://www.gimp.org
- CD Covers
-
http://www.cdcovers.cc
- List of Linux Distributions
-
http://www.linux.org/dist
Final Notes:
With all the information provider earlier, you should have no problem to made your own cases.
At a first time you could think that make this cover is complicated, because all the text present here, but you should understand that here is explained how use some editor image programs, if you already know work with them, then, only the topic Doubling Paper Case are really important to you, and you will see how easy is making this case, and even if you don't know nothing of those programs, when you learn them, what is easy, you will see that is not a big deal follow the steps without any kind of mnemomonic, because it's all very intuitive.
It is possible, that you find my text a little (or very) exotic, but you should understand that the English are not my mother language, therefor I appreciate that some one send me via e-mail any correction.
For any question or misunderstood you can contact me via e-mail, I will try answer.
Go Top


